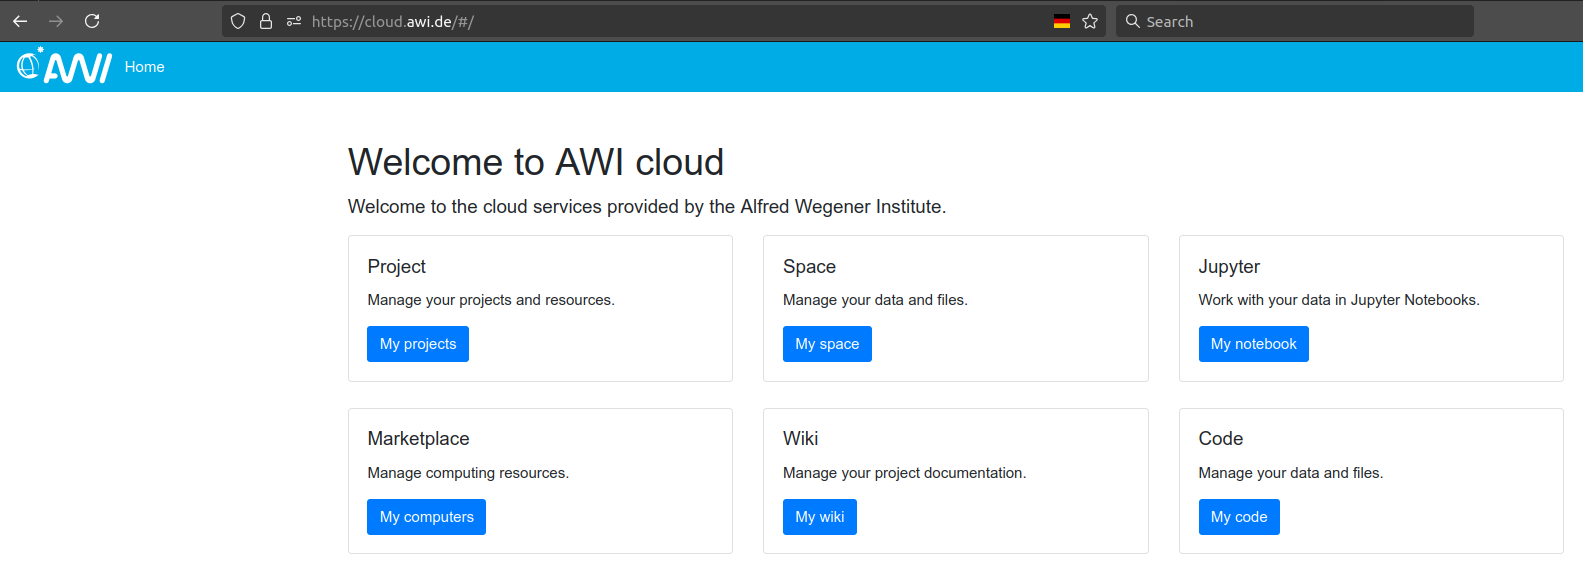
O2A WORKSPACE
The workspace is a combination of tools and concepts in the O2A world. It consists of
- project storage
- nextcloud
- a marketplace for computing resources
- a jupyter hub
- documentation space
- a gitlab repository
The project folder is the central storage for all your project data. It can be mounted to your personal devices, certain virtual machines, or integrated in your nextcloud. The offical documentation gets more detailed about it.
project
nextcloud
marketplace
create a general purpose vm
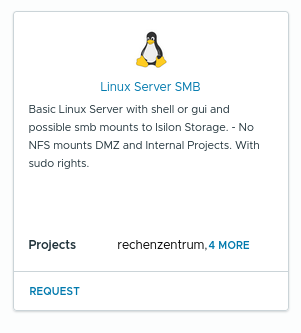
Go to cloud.awi.de, click the marketplace (see figure), choose dmawi as the AUTHENTICATOR !!!!!!, use your AWI credentials to login, and finally select the service broker
On the left-hand side choose catalogue
Request a virtual machine from the blueprint Linux Server SMB. The naming might change in the future, at least it should be capable i) to apply
sudocommands, ii) to mount isilon storage via smb.
- specify the details for your request
- version of the blueprint, choose latest
- dropdown menu of available projects, depends on the requester
- human-readable name of your vm
- only shell means command line only, there is a graphical version available too
- CPU and RAM size of the VM
- operating system, choose latest
- network, choose DMZ (134.x.x.x/24 network), otherwise most project folder are not available
- GO!
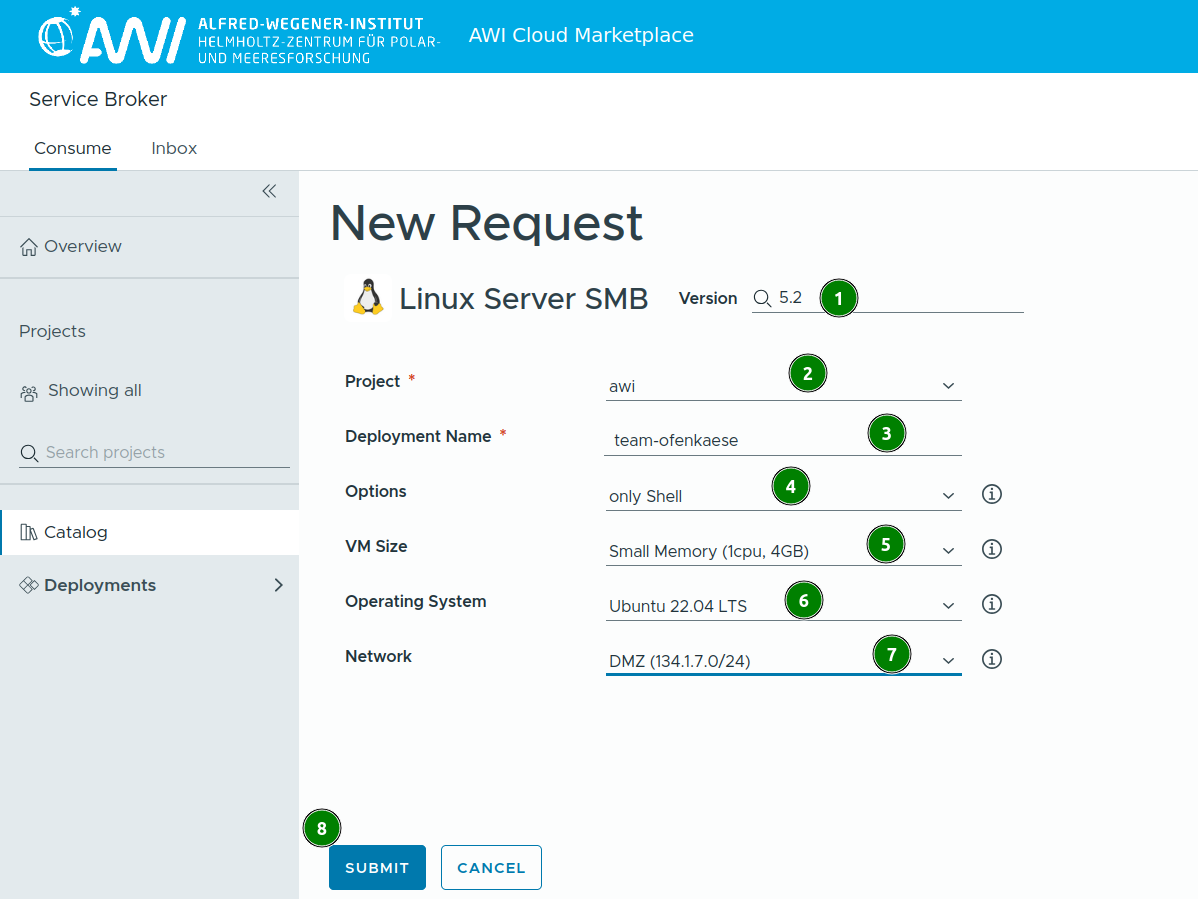
- the deployment can take a while (~20-30 minutes)
- the newly created vm can be found under deployments on the left panel, by clicking the
>>next to the deployment name its details are revealed
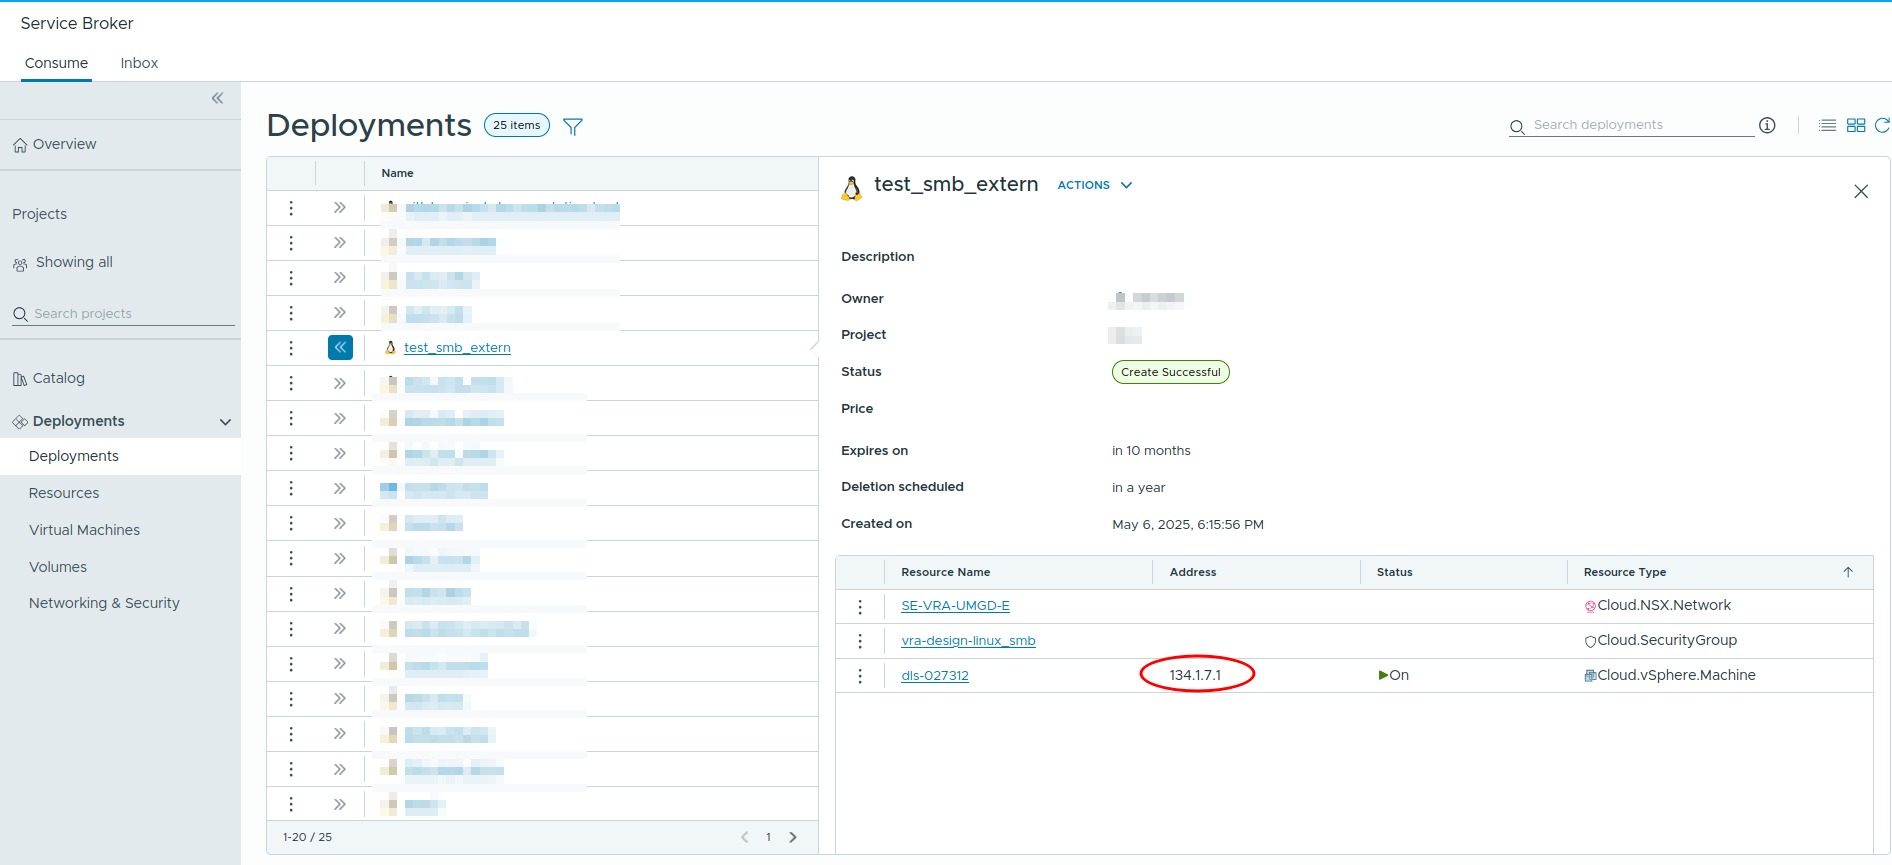
Connect to the vm by:
- using your username and the IP ->
ssh name@134.x.x.x, or - using your username and hostname ->
ssh name@awi-592752.cloud.awi.de(whileawi-5927521is the hostname of your specific machine)
After successful login you are connected to a bare linux machine. Only basic programs are pre-installed. To install the software of your choice use APT, for this the sudo command is necessary.
A good start is this set:
bash
sudo apt-get install htop git python3-pip python3-venv curl cifs-utils- htop, ncurses-based process monitoring
- git, version control system
- python3-pip, python package manager
- python3-venv, virtual environments for python
- curl, transfer data via urls
- cifs-utils, supports SMB-shares
When all packages are installed a project folder can be mounted to the vm following the official instructions under "permanent mount". It has proven good practice to mount external drives to /mnt. Be aware of the possible restrictions at /mnt for local users, since everything there by default belongs to root or user with administrative rights respectively. To make a folder there accessible to "normal"/unprivileged users make use of the sudo superpowers and change the permissions. Something to read about users and groups in the linux world.
Create a folder:
bash
userwithadminrights@newlycreated-vm:~$ sudo mkdir /mnt/this_is_a_testfolders
userwithadminrights@newlycreated-vm:~$ ls -l /mnt/
total 4.0K
drwxr-xr-x 2 unprivilegeduser p_projectxyz    0 Jul 29  2024 projectxyz/
drwxr-xr-x 2 root root 4.0K Jun 17 11:01 this_is_a_testfolders/Change permissions for someone and a unix group, that needs access:
bash
userwithadminrights@newlycreated-vm:~$ sudo chown unprivilegeduser:p_projectxyz /mnt/this_is_a_testfolders/
userwithadminrights@newlycreated-vm:~$ ll /mnt/
total 4.0K
drwxr-xr-x 2 unprivilegeduser p_projectxyz    0 Jul 29  2024 projectxyz/
drwxr-xr-x 2 unprivilegeduser p_projectxyz 4.0K Jun 17 11:01 this_is_a_testfolders/Now you have a general purpose virtual machine running that has your project folder mounted. All kinds of processing pipelines can be run there.
special purpose virtual machines
... coming soon ...
jupyterhub
spaces
well, it's https://spaces.awi.de ...